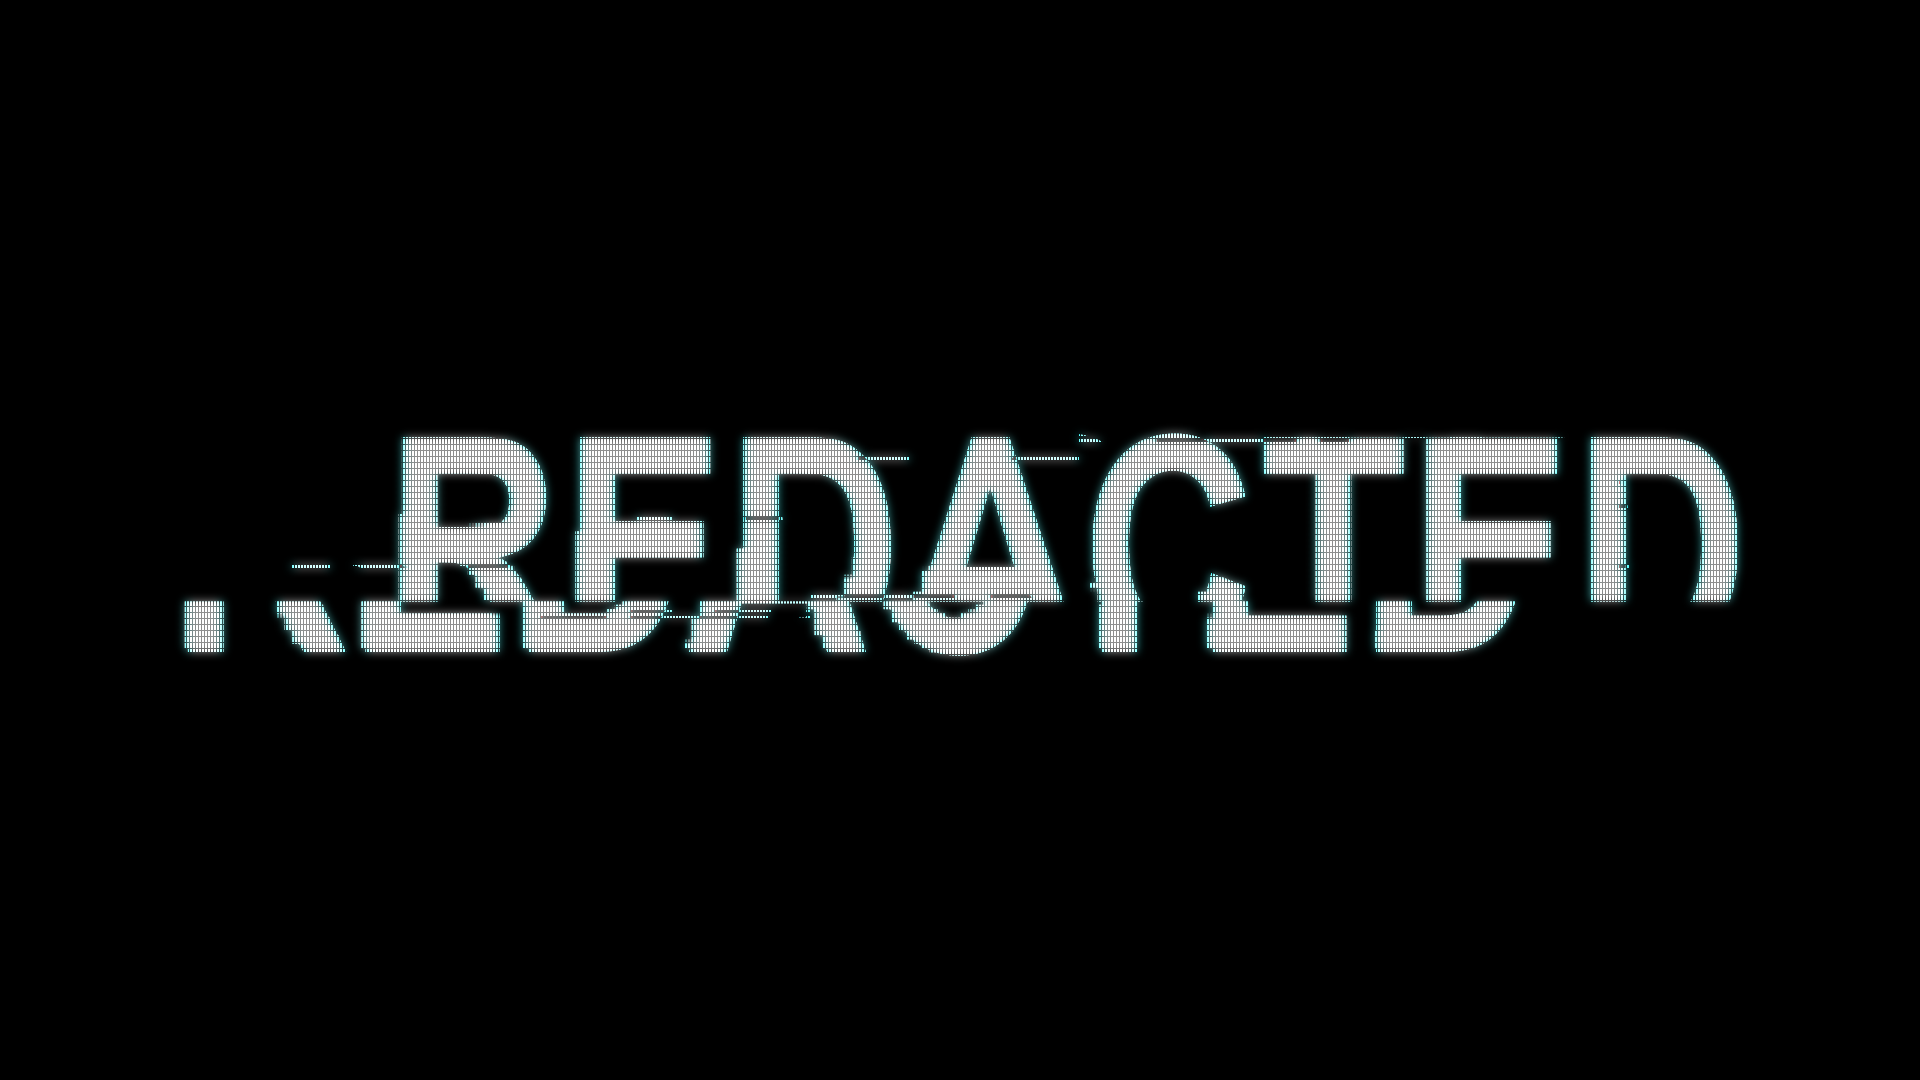
With Ubisoft’s Watch Dogs coming out later this month, I thought I’d put together a tutorial showing you how to create a short intro ident that’s inspired by the game’s logo.
As usual, it uses only the standard tools you’ll find in your copy of After Effects (CS5 upwards – it may even work for CS3, but I can’t verify that), including Card Wipe and Mosaic, and the project file is available for free download in the store.
VIDEO VERSION
TEXT VERSION
First, create a new composition, and call it Text Animation. The details in this tutorial are based on the HD (1920x1080px) preset, and it’s set to 5 seconds long. Create a new text layer and add your title text. You can use any font you like. The original looks like it uses Helvetica Bold Condensed, but if you don’t have this installed, you can go with Arial Narrow Bold, which is pretty similar. Set it to 300px and centre-aligned, then hit CTRL+Home to centre it in the frame, and adjust the anchor point to drop it down a little.
The starting point for the animation is this random character reveal, which is fairly simple to achieve. Twirl down the properties for your text layer and open the wing menu by clicking on the arrow where it says Animate. Select the Character Offset option, and a bunch of extra settings will be added to the layer.
The main part of the animation is one second long, with a couple of twitch effects added later on in the sequence. So, at the beginning of the timeline add a keyframe to the Range Selector Start value of zero per cent, and a Character Offset keyframe set to 25. Then place your Current Time Indicator at the one-second point and add a Start keyframe of 100 per cent and a Character Offset of 0.
This will give you a random text effect that gradually resolves itself into the original text you entered earlier.
To make the text ‘twitch’ later on in the sequence, put your CTI where you want it, and add two new keyframes to lock in the Start and Character Offset values – then hit Page Down once to advance a single frame and add two more – zero per cent for Start, and a Character Offset of 2. Then advance four more frames and add two new keyframes that return these values to 100 per cent and zero. You don’t have to stick with these values – for instance the twitch I added towards the end uses a Character Offset of 48 and a Start value of 75 per cent, so that it only affects the last two characters of my title.
DIGITAL NOISE EFFECTS
The next step is to create some digital block effects. Create a new Composition that matches the one you just created by dragging the Text comp onto the New Composition button at the bottom of the Project panel. Hit CTRL+K to bring up the Composition Properties and change the title to Slice.
Select the Text Animation composition layer, then hit CTRL+D to duplicate it and rename the new layer Low Res. With your new Low Res composition layer selected, grab your Pen tool from the top menu and draw a Mask on the layer so that it’s sliced through the middle at an angle. Then duplicate this layer and rename the new layer Block Noise.
To create the low-resolution look on the bottom half of the text, go to your Effects and Presets panel and find the Mosaic effect and drag it onto your Low Res layer. Then in the Effect Controls panel, set the Horizontal and Vertical values to 250 (or whatever takes your fancy) and tick the Sharp Colors box.
For the more extreme digital block noise, find the Card Wipe effect and add it to the Block Noise layer, then add the Mosaic effect to this layer as well.
In the Card Wipe settings in your Effect Controls panel, set the Transition Completion value to 0, make sure that Independent is selected for Rows & Columns, and set the values beneath to 20 and 20, then drop the Card Scale to .8. Next change the Timing Randomness to 1 and the Random Seed to 10. Finally, twirl down the Position Jitter options and set the X Jitter Amount to 1.
This will create some random blocks around the bottom half of your text (remember the top half is cut off by the mask you created). To freeze the animation at the one second mark, put the CTI on this point and create a keyframe on the X Jitter Amount value, then hit Page Down once to advance one frame, then create a new keyframe with a value of 0.
Again, you can create twitch effects by adding more keyframes to the X Jitter Amount. Don’t feel you have to stick to the recipe for this one.
Then go to the Mosaic effect that you added after your Card Wipe and set the Horizontal Blocks to 20 and the Vertical to 50, and again, switch the Sharp Colors option on.
Grab your Slice composition and drag it onto the New Composition button in the Project panel, hit CTRL+K to bring up the properties and call it Horizontal Breaks. This will create a comp that’s the same size and duration, with your Slice comp nested inside it.
Rename the Slice comp layer Wave Warp, duplicate it using CTRL+D and name the new layer Block Dissolve.
To create the random broken lines, find the Block Dissolve effect and drag it onto your Block Dissolve Layer. Then, in the Effect Controls panel, set the Transition Completion to 95%, the Block Width to 270 and the Block Height to 3. Leave the Feather at 0, and make sure that Soft Edges is switched off.
This won’t do anything until you change the Blending Mode of the layer itself, so move to the Composition panel and look for the Mode menu. If you can’t see it, just hit F4 and it’ll swap the Composition column view.
Modes affect how the transparency of layers affect any layers beneath. When you select Difference as the Blending Mode for the Wave Warp layer, After Effects looks at both layers, and removes any values that are different. So if I switch this Mode to Normal and hide the layer underneath, you’ll see the lines we’ve created. When I set this back to Difference, and bring the Wave Warp layer back into view, these lines are then removed from the layer beneath.
All of the effects in this tutorial are pretty flexible, so don’t be afraid to experiment with different values to get the look you want.
SPLIT/SHEARED SCREEN
Find the Wave Warp effect in the Effects & Presets panel and add it to your Wave Warp layer. Obviously, the default values need some adjustment, so go to the Effect Controls panel and change the following.
Set the Wave Type to Square, and set the Wave Height to 0. Set the Wave Width to 270, the Direction to 0 and the Wave Speed to 0.
Move your CTI to the time that you want this effect to happen, and create a Wave Height keyframe to lock it on 0. Then hit Page Down once to advance a single frame and create another keyframe of 107. If this doesn’t seem to change anything, you may need to tinker with the Wave Width value a bit. When you’ve got the split where you want it, move forward another frame and create a new Wave Height keyframe that brings it back to 0.
If you want to duplicate this effect so that it appears in more than one place, just select the Wave Warp layer and hit U to reveal the keyframes, select them and hit CTRL+C to copy them, and just paste them wherever you like.
LCD MONITOR EFFECT
The last step is to give it an LCD monitor look. This isn’t actually how it looks in the game ident, so you can skip this bit if you want to be true to the original. If not, let’s carry on.
Drop your Horizontal Breaks comp onto the New Composition button, and call it Pixel Effect. Add the Channel Blur effect and set the Red Blurriness to 5 to give it a blue edge.
Then, grab the Grid effect and drop it onto the Horizontal Breaks layer. In the Effect Controls panel, select Width & Height Sliders, and change the Width value to 3 and the Height value to 6. Then set the Border value to 2. Put a tick in the Invert Grid box and then select the Stencil Alpha blending mode from the drop-down menu. And this will create a pixel effect.
Then add the default Glow effect, and you’re done.




Leave A Comment
You must be logged in to post a comment.